


- Pick up from the store from 18.11.2026
- Home delivery from 16,90 € from 2-3 tööpäeva
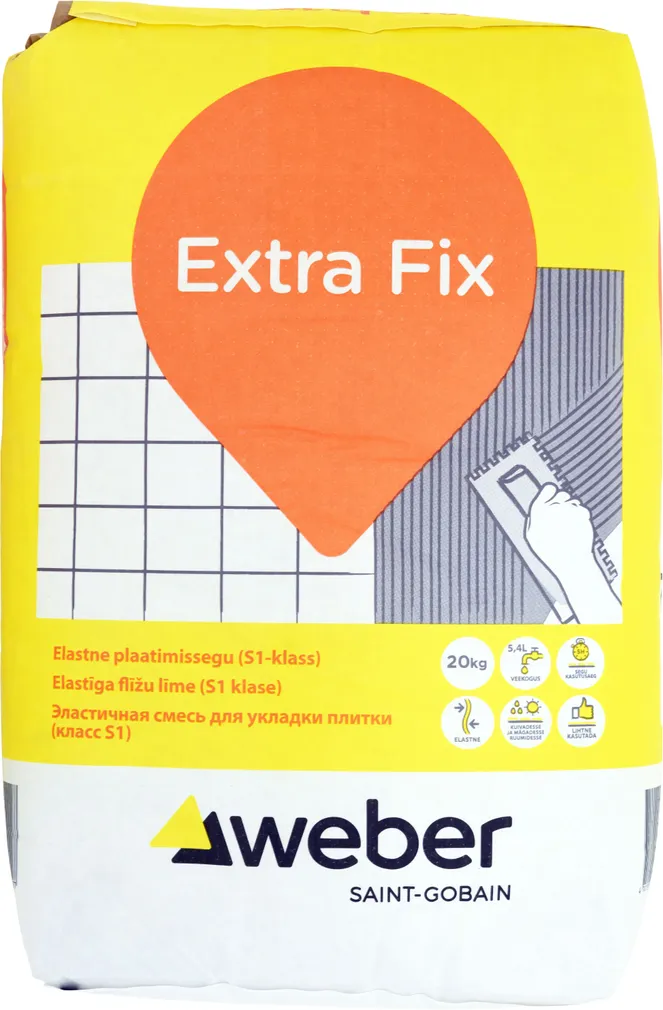
WEBER EXTRA FIX TILING MIX, 20 KG
SKU: 743309
14.39 € /pcs
10.07 €
The special prices of the online store may differ from the prices of the regular store
Discount 4.32 € (30%)
E-shop campaign price for a logged-in customer
• Elastne (S1-klass) plaatimissegu ebastabiilsetele pindadele (nt pesuruumi veetõke).
• Väga hea nakkuvus erinevatel pindadel. Köetavatele ja deformeeruvatele pindadele.
• Pakendi kogus 20 kg.
• 14-päevane tagastusõigus
• Väga hea nakkuvus erinevatel pindadel. Köetavatele ja deformeeruvatele pindadele.
• Pakendi kogus 20 kg.
• 14-päevane tagastusõigus
- Pick up from the store from 18.11.2026
- Home delivery from 16,90 € from 2-3 tööpäeva
Weber Extra Fix is a flexible (Class S1) tile adhesive with enhanced adhesion for unstable surfaces in dry and wet areas (suitable for waterproofing). Thanks to its high adhesion strength and elasticity, it can also be used for tiling commercial and warehouse floors, as well as other surfaces in public areas. Package size: 20 kg.
Advantages:
• Flexible (Class S1)
• Excellent adhesion to various
surfaces• Suitable for heated and deformable
surfaces• Low slippage
on vertical surfaces• Thixotropic
Before use:
Surfaces to be tiled must be clean, solid, and dimensionally stable. The substrate must be cleaned of substances that weaken adhesion, such as dust, oil, cement slurry, and non-moisture-resistant fillers. Minor surface irregularities should be leveled with tile adhesive before starting work. When tiling freshly poured concrete surfaces, it is recommended to scrub the substrate with a stiff-bristled brush or a wooden scraper before starting work to remove cement slurry, which weakens adhesion. During work and for the two following days, the temperature of the substrate, the mixture, and the tiles must be above +5°C.
Use only clean water for mixing. Water consumption is 5.4 L per 20 kg. Mix the mixture twice using a whisk attached to a drill. The first mixing is done with less water, and the mixture is allowed to stand for about 10 minutes. Then mix once more and add the remaining water. The pot life of the prepared tile adhesive is 5 hours from the time water is added.
Application instructions:
Apply the mixture to the surface using the smooth edge of a notched trowel, then comb the mixture with the notched edge. When applying the mixture, take its working and setting times into account; therefore, apply the mixture only to an area that can be tiled within 10 to 15 minutes. Tiling time is affected by the surface’s absorbency, temperature, and ventilation. Place the tile tightly against the surface of the mixture and press it into the mixture with light pressure. This ensures the necessary adhesion between the tile and the substrate. The position of the tiles can be adjusted within approximately 10 minutes, depending on the absorbency of the substrate. Tile with open joints; horizontal joints are created using a jointing cord. The cord is removed after the mortar has set. To check the tile’s adhesion to the mortar, remove a tile from the wall or floor and inspect the back. With good adhesion, nearly the entire back of the tile is covered with mortar: 80% for wall tiles and 90% for floor tiles. To achieve sufficient adhesion, the correct ratio between the texture of the tile’s back and the notches of the trowel must be considered. When installing large tiles, the tile adhesive may also be applied to the back of the tile. The mortar must not fill more than half the depth of the joint; excess mortar must be removed immediately. Do not walk on the tiled floor for 2–3 days! Clean tools with water immediately after use.
Coverage: approx. 3 kg/m² (when using a 9x6x6 mm tile notched trowel)
Open time: 30 min (E) (EN 1346)
Working time: approx. 5 hours after
adding water Bond strength: >1.00 N/mm² (EN 12004)
Slippage on a vertical surface: <0.5 mm (T) (EN 1308)
Classification: C2TE S1 (EN 12004), for indoor
use Water consumption: 5.4 L/20 kg
Binder: cement
| General | |
|---|---|
| Brand | Weber Saint-Gobain |
| Product code | 743309 |
| Package dimensions | |
|---|---|
| Product weight, kg | 20 |
| Package height, cm | 38 |
| Package depth, cm | 11 |
| Package width, cm | 24 |
| Weight, kg | 20 |
I'll follow myself
Pick up from the store from 18.11.2026
I'll come to the Bauhof store myself to order. Estimated time of delivery from the store is indicated on the product card. We will send you a notification when the goods arrive at the store.
Check out more detailed terms here Bauhof special transport
Home delivery from 16,90 € from 2-3 tööpäeva
Special transport is a convenient way to order large-scale materials. By entering the postal code in the shopping cart, we will find the exact cost of transport to your door. Charges for both goods and transport service at the same time. The exact delivery time of the goods is agreed in person by the Bauhof customer service.
Check out more detailed terms here